Protecting Excel Data
Restricting the activities of other users who can carry out on the page.


What Is Protecting Excel Data?
You may prevent other users from mistakenly or purposely modifying, moving, or deleting data in a worksheet by locking the cells on your Excel spreadsheet and protecting the sheet with a password.
This will prohibit other users from accessing the worksheet. For example, let's say you're in charge of the team status report worksheet, and you want to allow the team members to input data just in certain cells and shouldn't be able to change anything else.
Users will not be able to change the data in any other area of the worksheet if they use the worksheet protection feature, which allows you to make just particular sections of the sheet editable.
First things first: whether you use a password or not, protecting a worksheet requires two steps: first, you must unlock cells that others may modify, and then, you can secure the worksheet.
- First, unlock the cells that need to be changed.
- Find the worksheet tab you want to safeguard in your Excel file and click it.
- Indicate which cells others can change by selecting them.
- Select Format Cells (or Ctrl+1, or Command+1, on a Mac), then click the Protection tab and uncheck Locked.

- When you protect a worksheet, you can restrict the activities other users can carry out on the page. You might, for instance, provide users the ability to select cells, format cells, or sort data; alternatively, you could set the sheet to "Read Only" so that no modifications could be made.
- You can exclude particular users from the worksheet security feature, enabling those users to edit the sheet even while it is locked down.
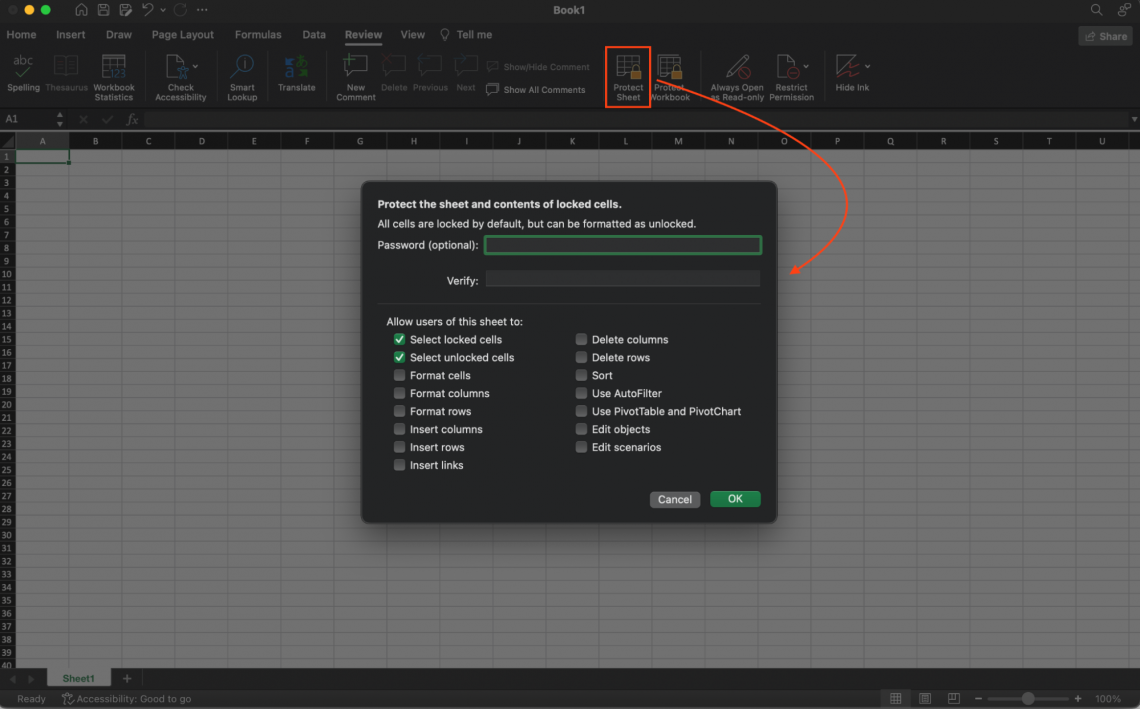
- To safeguard a worksheet, go to the "Review" tab on the ribbon and choose the "Protect Sheet" button from the available options. In the next dialogue box, you can provide a password (this step is optional) and choose which activities users are permitted to carry out on the sheet.
- Click the "Review" tab on the ribbon, and then click the "Unprotect Sheet" button to unprotect a sheet you have already protected. If you secured the document with a password, you would be required to enter it at this point.
How to Protect a Worksheet
The next step is to choose the activities that end users should be able to carry out on the sheet. These activities may include adding or removing rows or columns, altering objects, sorting, or utilizing AutoFilter.
In addition, you have the choice to safeguard your worksheet with a personal password.
To prevent unauthorized users from removing the protection from the worksheet, it is required to enter the password to unprotect the sheet.
The measures necessary to protect your sheet are detailed below.
1. Click the “Protect Sheet” button under the Review tab.
2. Choose the components of the worksheet you want other people to be allowed to edit from the list labeled “Allow all users of this worksheet to.”
How to Protect Data
Let's put everything we've learned about protecting a worksheet and locking and unlocking cells into practice by giving it a go by following a simple, step-by-step guide.
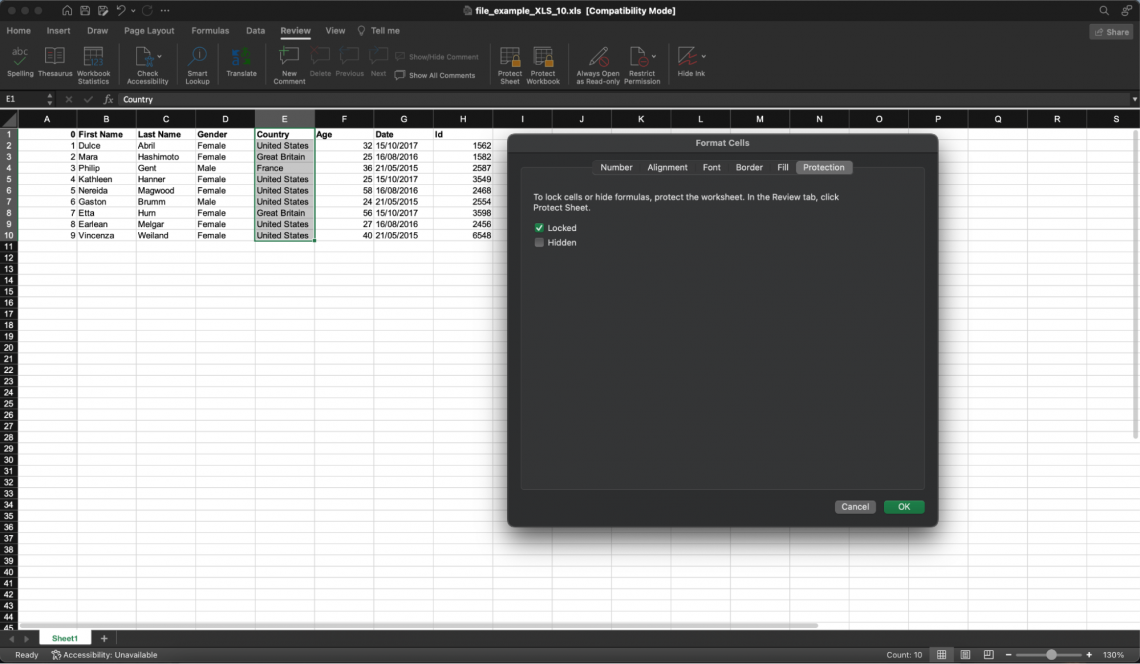
1. To begin, let's underline the cells that contain the answers we need to open. In this instance, we will signal that the "Country" input fields are input cells by highlighting them in red and placing an asterisk next to them.
2. Now that we have the input cells highlighted in red. Let's format them by pressing the Ctrl and number one keys simultaneously.
In the window labeled "Format Cells," we will go to the "Protection" tab and ensure that the "Locked" checkbox is selected by clicking on it.
To go back to the spreadsheet, press the OK button.
3. After entering data into the spreadsheet, we will lock the whole sheet. Then, we'll use the "Review" tab's "Protect Sheet" button to secure the workbook.
Since it is not mandatory to use a password, we will leave it for this demonstration.
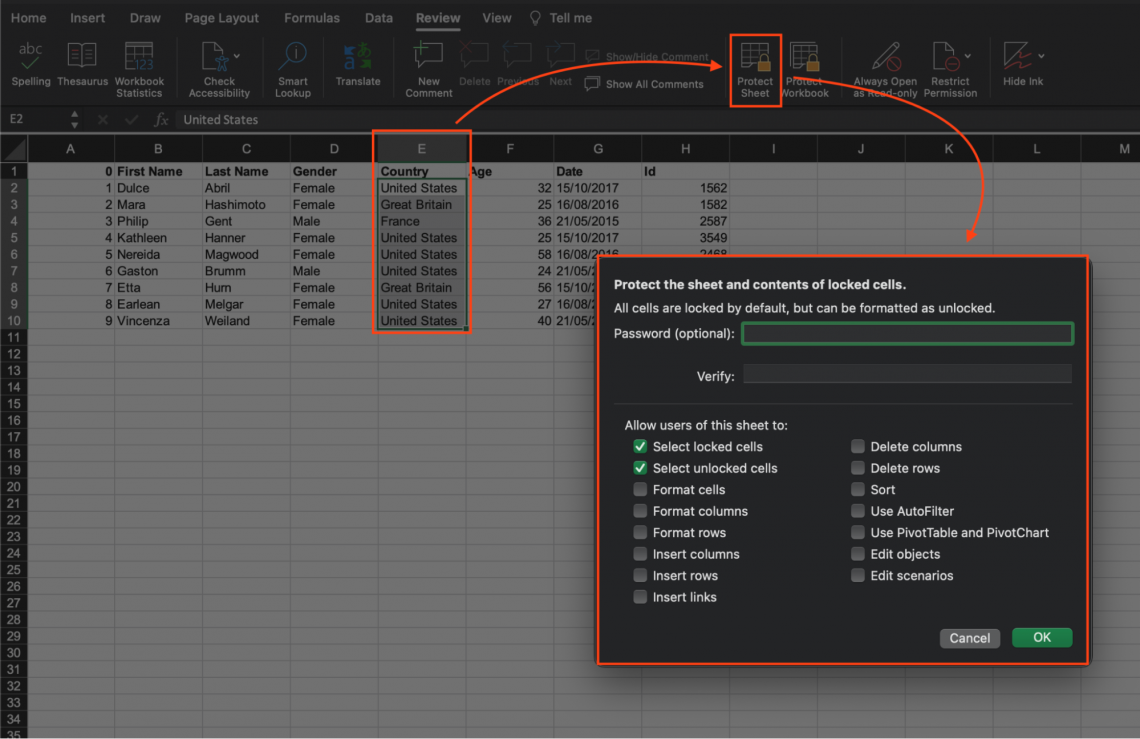
4. When we validate this operation by clicking the OK button, we will see that all cells have been locked and uneditable.
NOTE
Protection at the worksheet level is not meant to function as a security feature. It only stops users from making changes to locked cells inside the worksheet. A password used to secure an Excel file or a workbook is not the same as a password used to protect a worksheet.
Grouping Cells
If you lock a range of cells, you can prevent other users from making changes to the data and formulae that are included inside that range.
The protection feature of Excel's worksheets may help deter unauthorized users from tampering with your information by prohibiting them from modifying the protected worksheet.
NOTE
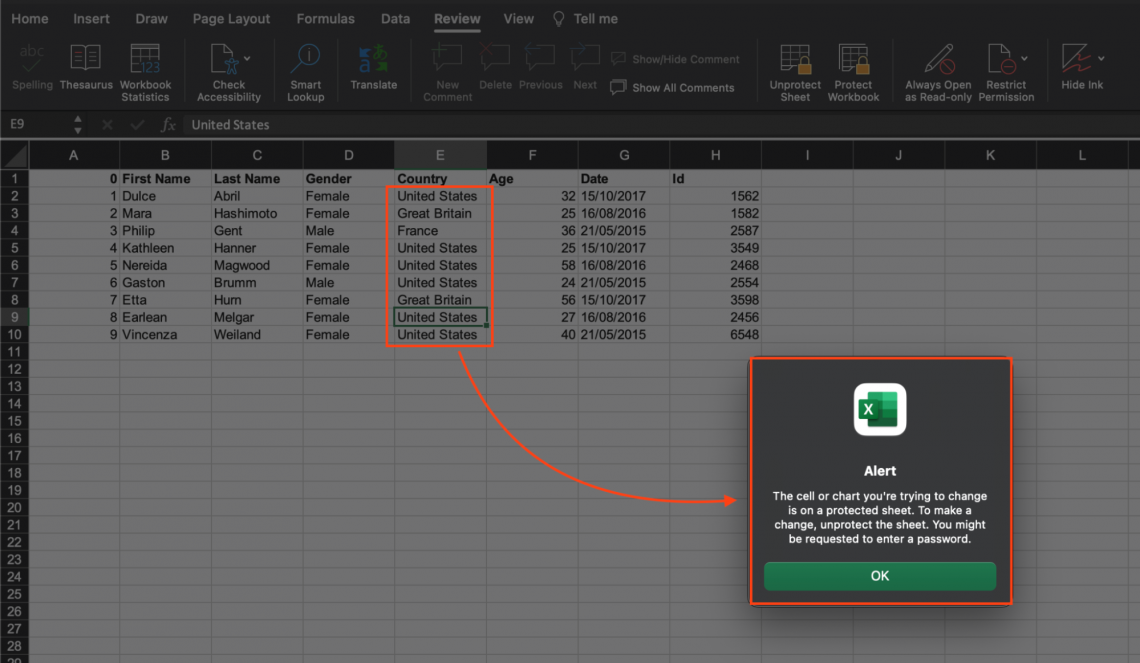
Any changes made to the information housed inside a protected worksheet will be disregarded.
Let's take it for granted that you toiled away at a spreadsheet for a considerable amount of time. You will now need to be acquainted with locking the cells in your Excel sheets to prevent accidental changes to the data. This will allow you to avoid making any modifications to the data.
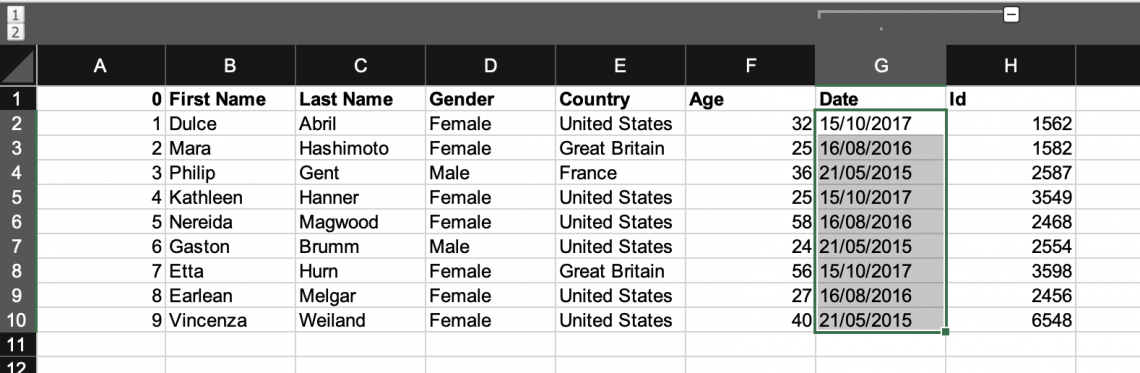
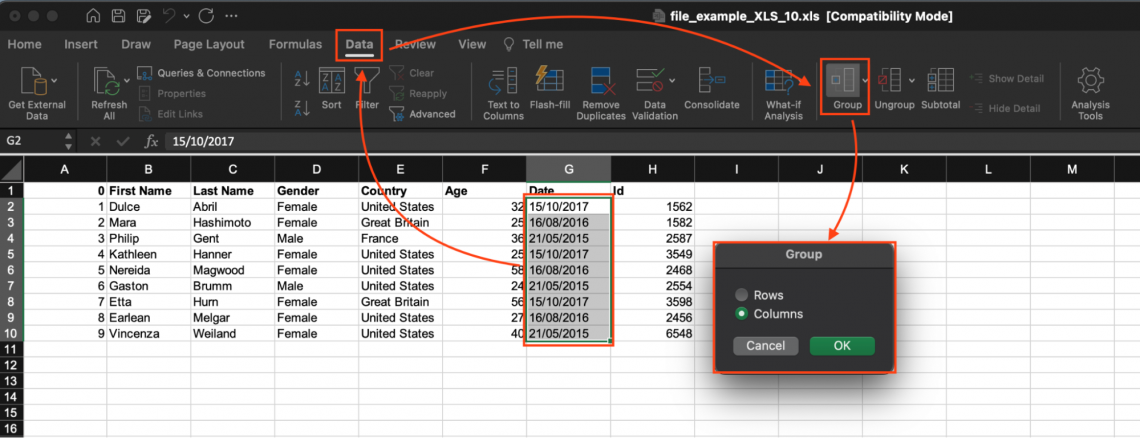
1. Choose the rows or columns you wish to group; like in this screenshot below, we are picking the column.
2. Click the "Group" command after selecting the "Data" tab on the ribbon's navigation bar. You will see a dialogue window with two alternatives, rows or columns, pop up for you. Choose any of the two options that correspond to your choice in the worksheet you're working on.
Conclusion
Protecting Excel data through cell locking and worksheet protection serves as a vital safeguard against unauthorized modifications or deletions.
By selectively unlocking specific cells for editing and then applying sheet protection, users can maintain data integrity while allowing controlled access to designated areas of the worksheet.
You will be able to safeguard your Excel sheets properly, guarantee that the data will stay correct and up to date if you follow these procedures, and get an awareness of the possibilities of worksheet security.
Mastering the techniques of cell locking, grouping, and worksheet protection ensures efficient data management and minimizes the risk of errors in critical spreadsheets.
Excel's built-in features empower users to enforce security measures tailored to their data protection needs, offering peace of mind and confidence in the integrity of their spreadsheet operations.

Free Resources
To continue learning and advancing your career, check out these additional helpful WSO resources:


or Want to Sign up with your social account?