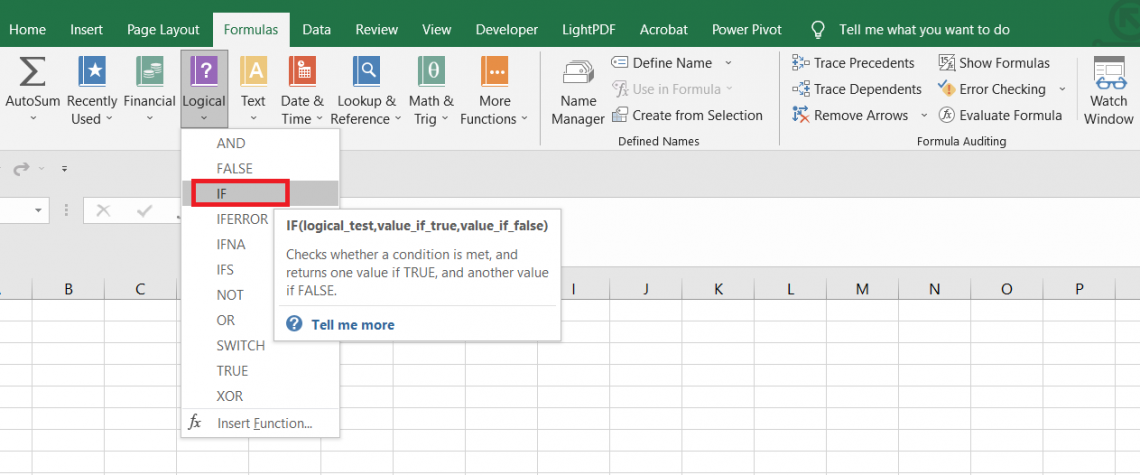
IF Function
An Excel function categorized as a Logical function that evaluates a given condition and returns the result as TRUE if the criteria are met; if they do not, the result is FALSE.


What is the IF Statement Function in Excel?
The IF statement is a logical function that evaluates a given condition and returns the result as TRUE if the criteria are met; if they do not, the result is FALSE.
The true power of the IF function lies in its ability to handle complex logical expressions using nested statements. Multiple IF statements can be combined to evaluate the same underlying entity using sophisticated decision-making structures.
However, this article will focus on the different components of the IF function's syntax before delving into nested statements.
The syntax for the function is:
=IF(logical_test, [value_if_true], [value_if_false})
- logical_test: (required) the condition which will be evaluated
- value_if_true: (optional) value which will be returned in case the condition evaluates to TRUE
- value_if_false: (optional) value which will be returned in case the condition evaluates to FALSE
- The IF function in Excel is used to perform logical tests and return one value if the test evaluates to TRUE and another value if the test evaluates to FALSE.
- Users provide three arguments to the IF function: the logical test, the value to return if the test is TRUE, and the value to return if the test is FALSE.
- potential errors that users might encounter when using the IF function, such as incorrect syntax, circular references, or mismatched data types, and how to troubleshoot them effectively.
- IF function is commonly used in data analysis to categorize or filter data based on specific criteria, enabling users to extract meaningful insights and make informed decisions.
Understanding Excel IF Function Statement
The IF Statement evaluates a given condition and returns TRUE if the condition is fulfilled or FALSE if it is not.
If there’s a function that forms the heart of all Excel operations, it would undoubtedly be the IF statement. This ever-reliable, versatile function helps the user perform logical tests and make decisions based on the results.
Assume you are driving through the woods and arrive at a point where the road diverts into two paths.
You see a sign that if you follow the path on the left, you will most likely encounter wild animals, whereas the path on the right takes you through the countryside.
If your goal is to prioritize safety, then choosing the path on the right becomes an obvious answer to travel on the next phase of the journey.
The IF statements work similarly. If a certain criterion is fulfilled, we get the result as TRUE, or else it will be FALSE.
This article will guide you on the IF function and how to use it, along with a couple of examples.
NOTE
The value_if_true and value_if_false are completely optional arguments. These can be replaced with a customized text string, numbers, errors, or even blank cells per the user's requirement by inputting the corresponding value.
If you ignore the argument, the function returns the boolean value TRUE for value_if_true and FALSE for value_if_false.
Comparison operators used in the If Statement Function
The comparison operators play a really crucial role in the use of IF statements. These symbols can be used to compare different values in the spreadsheet and help determine the relationship between them.

Some of the most commonly used comparison operators in Excel are:
- Equal to (=)
The equal sign checks if the two values are equal. For example, if we have two numbers as 14 = 14, the comparison between them will return the boolean value TRUE. If the numbers were 14 = 18, the result would have been FALSE. - Not equal to (<>)
When you say ‘not equal to’, then it is exactly opposite to the equal to operator. Suppose we have two numbers, 14 and 18. If we compare them, i.e., 14 <> 18, then the function returns the result as TRUE. - Greater than (>)
The greater than operator evaluates to TRUE when the number A is greater than number B. For example, if we compare two numbers, 18 and 14, as 18 > 14, the result would be TRUE. - Less than (<)
Opposite to the greater than operator, the less than operator evaluates to TRUE only when the number A is smaller than number B. For example, if the two numbers are 14 and 18 and we compare them as 14 < 18, then the result is TRUE. - Greater than or equal to (>=)
When you use the greater than or equal to operator, the value ‘should’ be either the same or greater than the other value. For example, suppose we have two numbers, 14 and 10.
Using the comparison 14 >=10, although both numbers are not equal, we can confirm that 14 is greater than 10, thus giving the result TRUE. - Less than or equal to (<=)
The less than or equal to the operator works opposite to the greater than or equal to.
In this case, if the numbers are 22 and 14 and you compare them as 14 >= 22, then the result will be TRUE since 14 is less than 22 even though it is not equal to 22.
By utilizing these comparison operators, you can enhance the use of IF statements and create more complex logical expressions.

Example of the If Statement function
In this section, we will see an example of how to use the function. Let’s take some really simple examples of how the function would work for different data types.
A) Text Strings
Suppose you have the list of stocks that you had traded in as illustrated below:
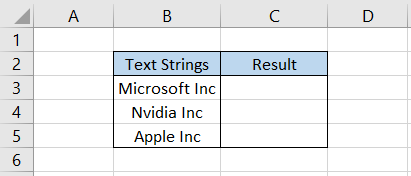
We need to evaluate whether you previously took a position in the ‘Apple Inc’ stock. To determine this, we can use the IF function, which will evaluate each of the text strings and return a corresponding result.
The formula will be =IF(B3="Apple Inc", "You have traded in Apple stock", ""), which gives the result as:
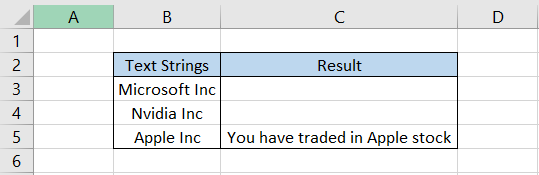
Since the formula matches the text string, we get a customized result as ‘You have traded in Apple stock. As the other two were not an exact match, the formula returns an empty cell.
B) Numbers
The use case of the IF function with numbers is extremely high. You can literally use all the comparison operators with the numbers.
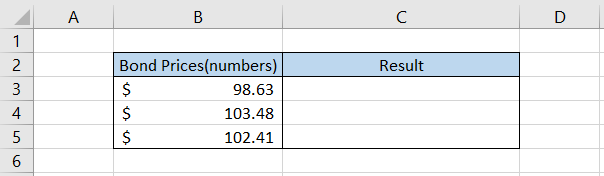
Suppose you purchased a couple of bonds from a secondary market over a period of time. You need to determine how many of those were purchased at a discount to the par value and how many were purchased at a premium price.
The data looks as illustrated below:
We know that most bonds have a par or redemption value of $100. Thus it becomes a criterion to evaluate whether the bonds were purchased at a premium or a discount price.

We will use the formula =IF(B3>100, "Bought at premium", "Bought at discount"), which gives the result as:
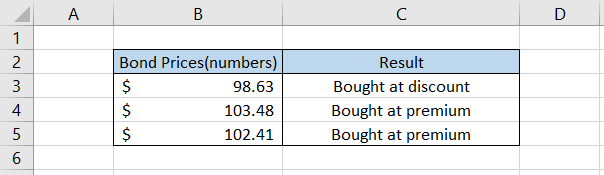
Instead of the customized text strings, you can even input the boolean values TRUE or FALSE, but then the interpretation of results ‘may’ become difficult.
C) Date & time
If understanding the operation with numbers was easy, then you already know how it's gonna be with the date and time value. As you might already know, even the date and time values are stored as numbers in Excel.
To be more precise, dates are stored as serial numbers beginning from 1st Jan 1900, while the 24-hour clock can assume any value between zero and one.
Suppose you have the dates as illustrated below:
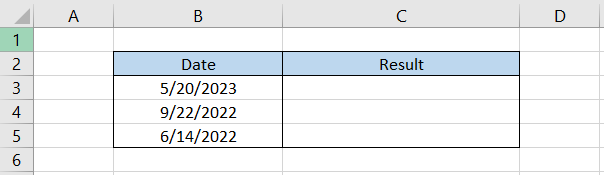
We want to evaluate how many dates are less than or equal to 20th May 2023(as of today).
The formula will be =IF(B3<=TODAY(),"Less than 20th May 2023",""), which gives the result:
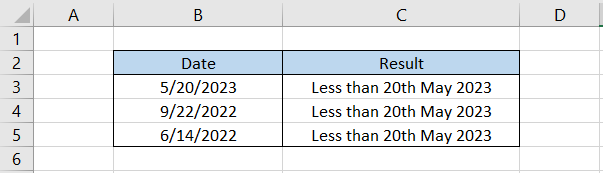
All the dates mentioned are either less than or equal to 20th May 2023. The same holds true for even the time values if you have a similar dataset.
D) Error-values
Finally, we arrive at how you can evaluate error values using the IF statements. There are several types of error values in Excel you might have come across, such as #NAME?, #NUM!, #VALUE!, and #REF! Etc.
Each of these errors is unique and has its dedicated function to capture them in the spreadsheets.
For example, if you need to capture #NA! Error in the spreadsheet, you can directly use the IFNA function.
However, what if we did not have generic or case-specific error-handling functions?
In this case, we can use the IF statements and the ISERROR function. ISERROR will identify all the types of errors and return a customized text string in return.
Suppose we have the data as illustrated below:
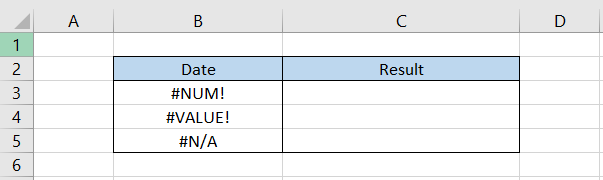
Let’s say these are some errors you encounter in the dataset. But you want to replace them with a customized text string.
In this case, we will use the formula =IF(ISERROR(B3),"Error Value",""), which gives the result:
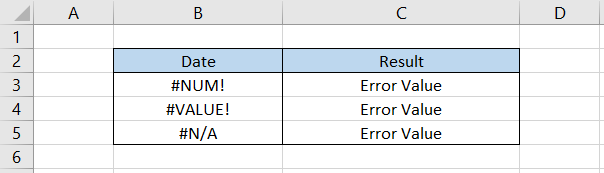
As you might have already noticed, we did not use any comparison operators but have directly referenced the cell in another function ISERROR. The ISERROR function can capture all the errors, including the #N/A.
We have another function, ISERR, which allows us to capture all the errors except #N/A.
Practical Example of If Statement
Now that we know how the function works with different values, let's see an example of how you can incorporate the function in a real-life scenario.

As we have already said, the possibility of using the IF statements in Excel has endless possibilities.
In fact, every other operation that you perform in Excel can be built upon a decision using the IF statements.
A) Single IF statement
A single IF statement is the simplest that you can use to build a decision tree where the output would either be TRUE or FALSE.
Suppose that you are evaluating the assignment for the students with a deadline of 21st May 2023. The data looks as illustrated below:
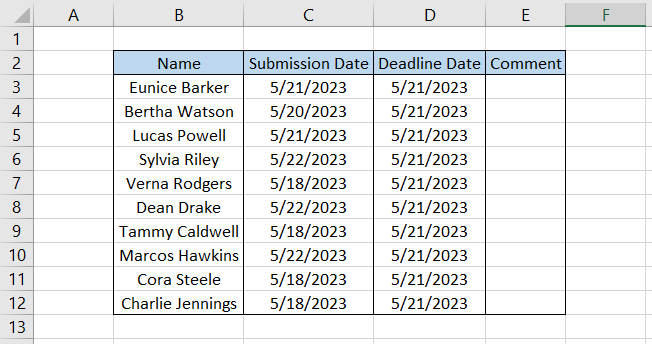
To determine whether the assignments were submitted before the deadline date, we will use the formula =IF(C3>D3,"Assignment submitted beyond the deadline date",""), which gives the result:
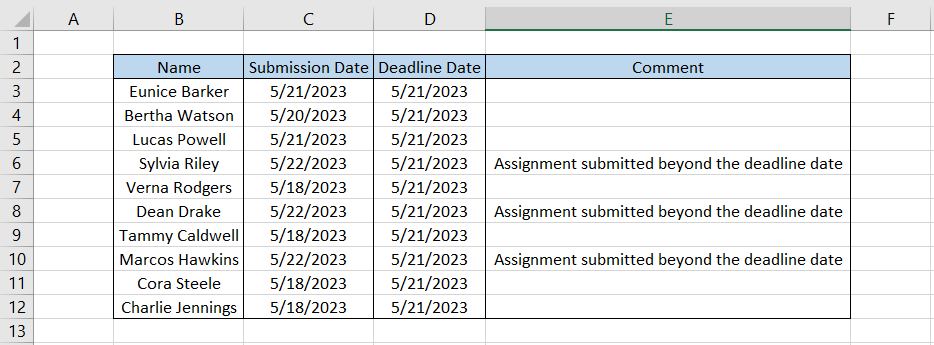
As you can see, only three students have submitted their assignments beyond the deadline date. For all the students that fulfilled the criteria of having a submission date greater than the deadline date, we get a customized text string, whereas, for others, we get a blank cell.
B) Nested IF statement
You aren’t limited to using a single IF statement in the spreadsheet. You can use multiple IF statements, i.e., up to 64, but it isn't always advisable.
Let’s revisit our example of analyzing assignments to determine whether they were submitted on time or not. However, this time, it's not just a single assignment that the student needs to do but a total of three before the deadline date of 21st May 2023.
The data looks as illustrated below:
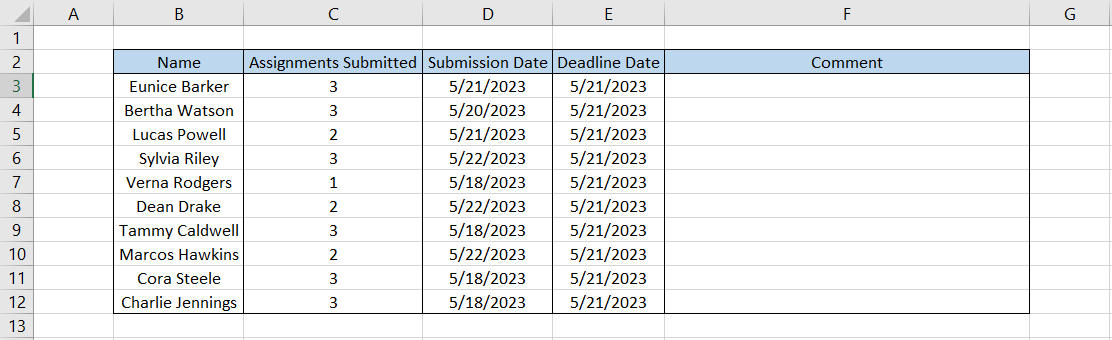
We will use the nested IF statements to evaluate whether all the assignments were submitted before the deadline date. The two different conditions of the formula would be:
- Check whether the number of assignments submitted is equal to 3
- Check whether the submission date is less than the deadline date
The formula will be =IF(C3=3,IF(D3<=E3,"All Assignments submitted on time",""),""), which gives the result:
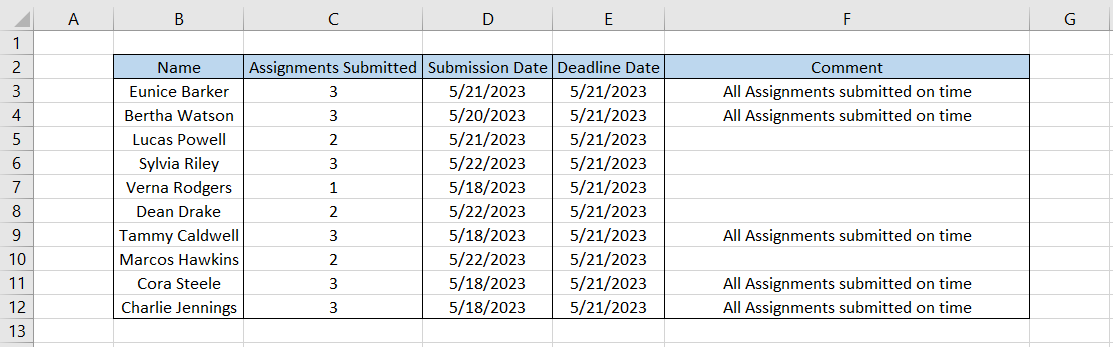
The formula first evaluates the condition's first part, i.e., whether three assignments were submitted or not. Then, if the condition evaluates to TRUE, it tests another condition, whether the assignments were submitted before the deadline.
If the first condition is fulfilled but the second isn't, the function returns an empty cell. On the other hand, if the first condition is not completed, then the formula doesn't even bother evaluating the second condition and directly returns the blank cell.

Free Resources
To continue learning and advancing your career, check out these additional helpful WSO resources:


or Want to Sign up with your social account?