Excel VBA Examples
A simple code that will copy the data from one file into another based on a single click.


Excel VBA Examples
When we bring up the Visual Basics for Application (VBA), a somewhat familiar question is always: "We do not have a coding background; can we learn VBA?"
And we have the same answer every time - "Yes, you can."
When I started learning about Visual Basics for Applications, I had no prior coding experience. Heck, I did not even have any hands-on experience in using Excel.
But that did not deter me from looking at Visual Basics for Application. Of course, I am nowhere near perfect for being a VBA superstar, but neither am I a newbie. After all, we know that learning is a continuous process, and this process should help us be wiser than we were yesterday.
This article will be based on simple code that will copy the data from one file into another based on a single click. A special shoutout to the stack overflow and other related communities where the peers are extremely helpful with the VBA codes.
If you ever feel that you might be stuck on a particular part of code, just post on those forums. We guarantee that you will get the desired direction in no time!
- You can enter debug mode by pressing the F8 key on the keyboard, which will let you check individual lines of code.
- While in debug mode, if you hover the mouse over the variables, you might get to check whether they have stored the data or not.
- You can also record a macro that captures your keyboard and mouse inputs and stores them as Visual Basics for Application code.
- You will rarely find two codes written for the same task to be the same.
- A piece of advice we can give you is to make as many mistakes as possible while writing the code and then correct them in debug mode, i.e., by pressing the F8 key. This will perfect your understanding of what needs input for different scenarios and what won’t work.
- Always save the file as a macro-enabled workbook once you have completed writing the code, or else it won’t work the next time you open it.
- If you are stuck, head over to the forums on the internet, which will guide you what the next step in the code. Believe us, along with that, the learning process would become a lot faster.
Writing your very first VBA code
Another question that most people ask is, why write such a code?
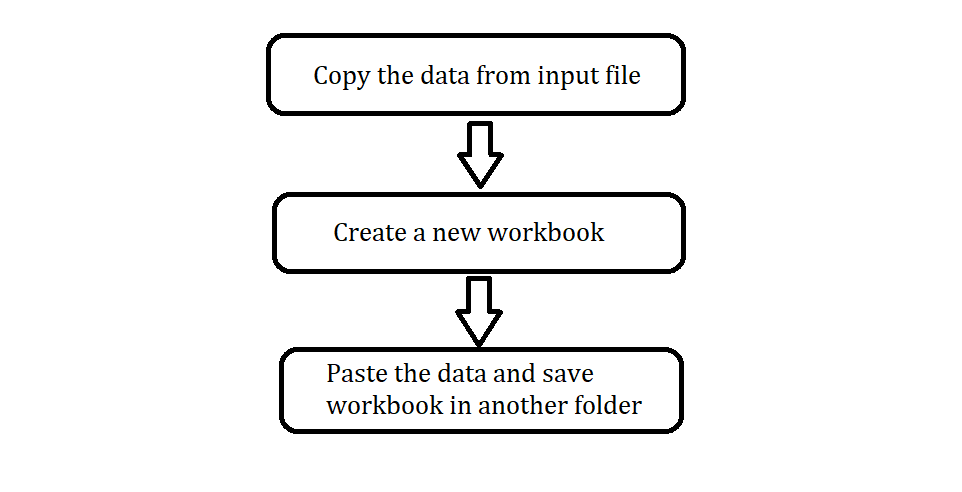
Well, it helps to automate your workflow. For example, let's say you have been working on a project where one of the simplest repetitive tasks is to copy data from the input file, create a new workbook, and then paste the data with the new workbook in a separate folder.
The flow of the task is as would be as illustrated below:
If you wish to write good VBA codes that would automate your repetitive task, the first step would always be visualizing what you want the code to do.
Now that we have laid out the general plan for what the code should do, we can open the Excel workbook.
You might have a question: Should we write the macro/VBA code in the input file or open a separate workbook?
Well, it entirely depends on you. We prefer to write codes in different excel workbooks as it allows you to share those files with others and does not store too much data, making the macro work smoothly.
The stage is set; let's see how we can write code that copies and paste data into a different workbook. Remember that you currently have three files:
- Input file
- Output file
- Macro file (file with the VBA code)

1. Open the Excel Workbook
Open an Empty workbook and head over to the Developer Tab. If you cannot find the developer tab, you probably haven’t enabled it from customizing ribbon option.
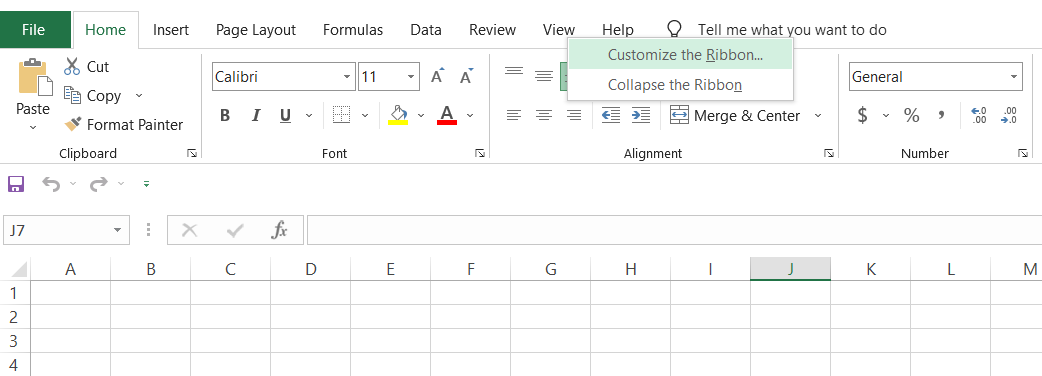
Right-click on any of the tabs and click on Customize the Ribbon. This will open up the dialog box as illustrated below:
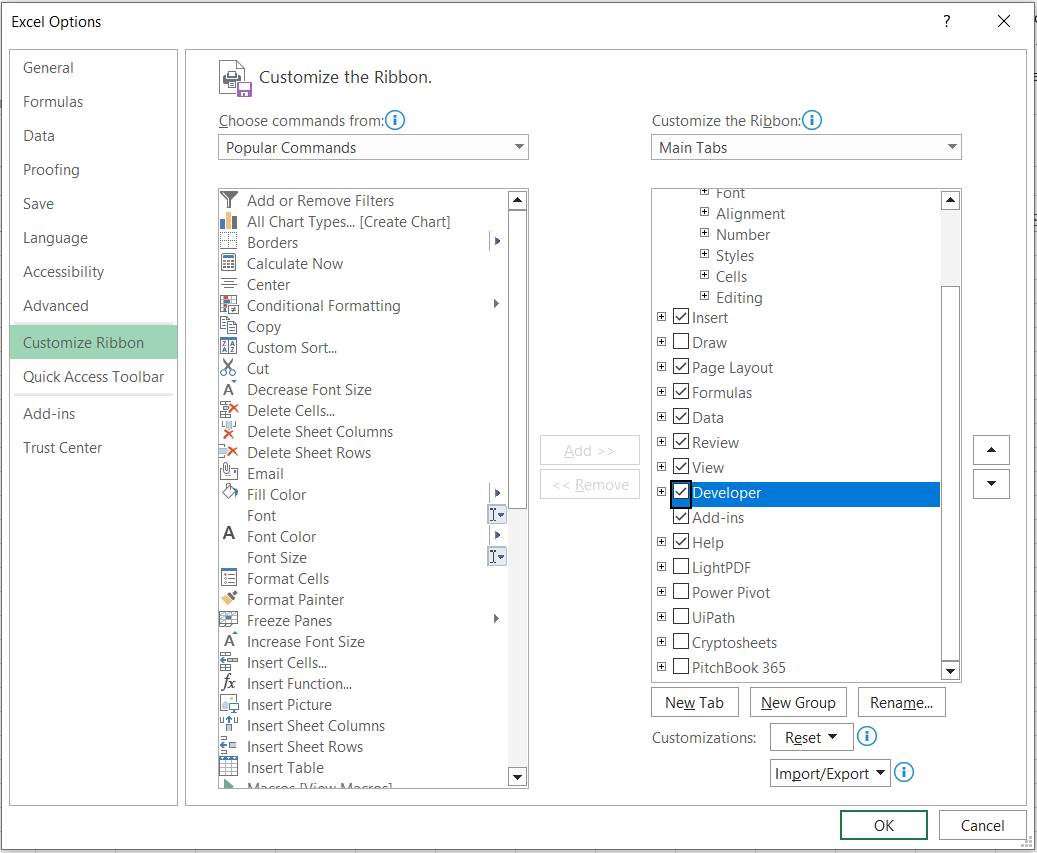
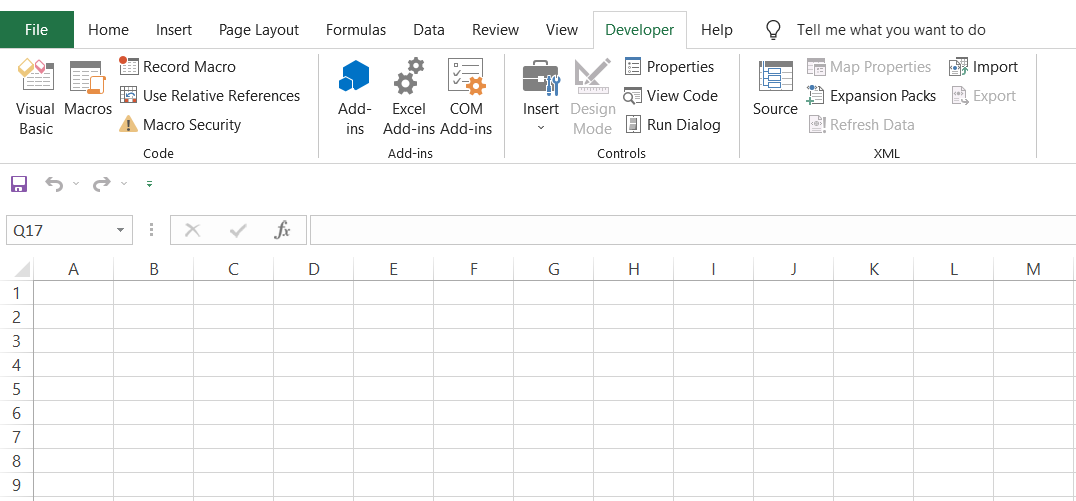
We will tick the box for the Developer option and then click on Ok. This should bring up the developer tab in your spreadsheet.
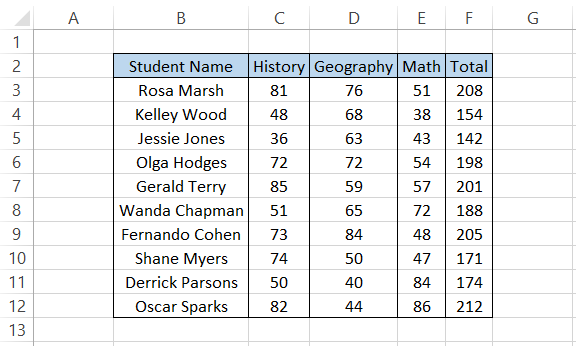
The data that you have in your separate Excel input file is as illustrated below:
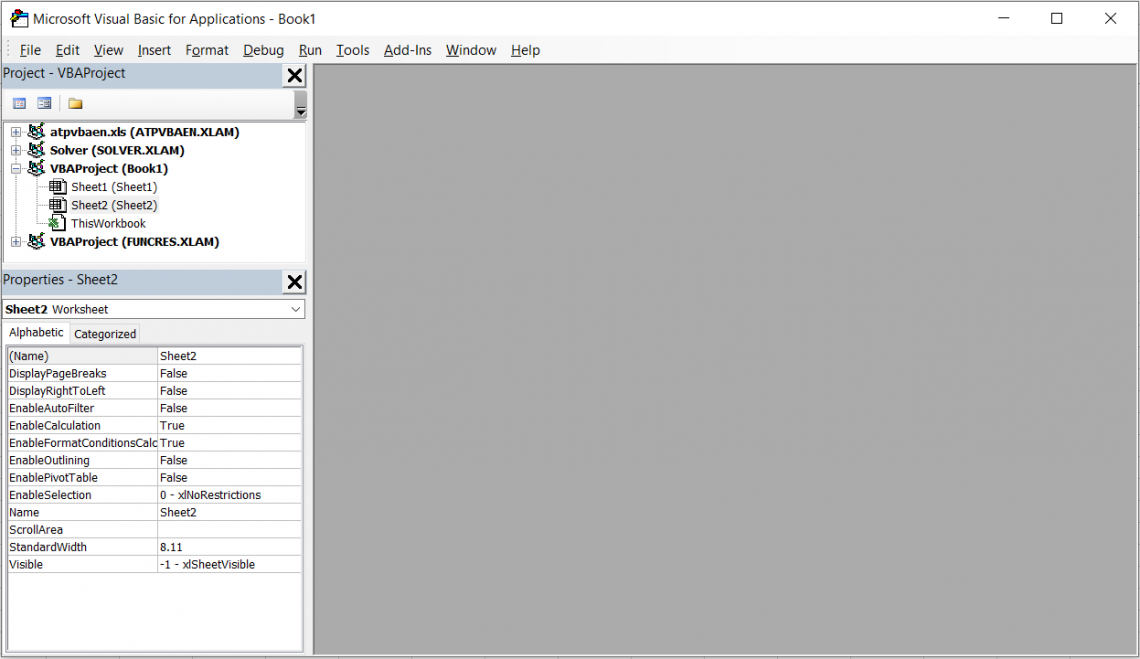
Next, we will click on Developer > Visual Basic in the macro file, which opens up the window:
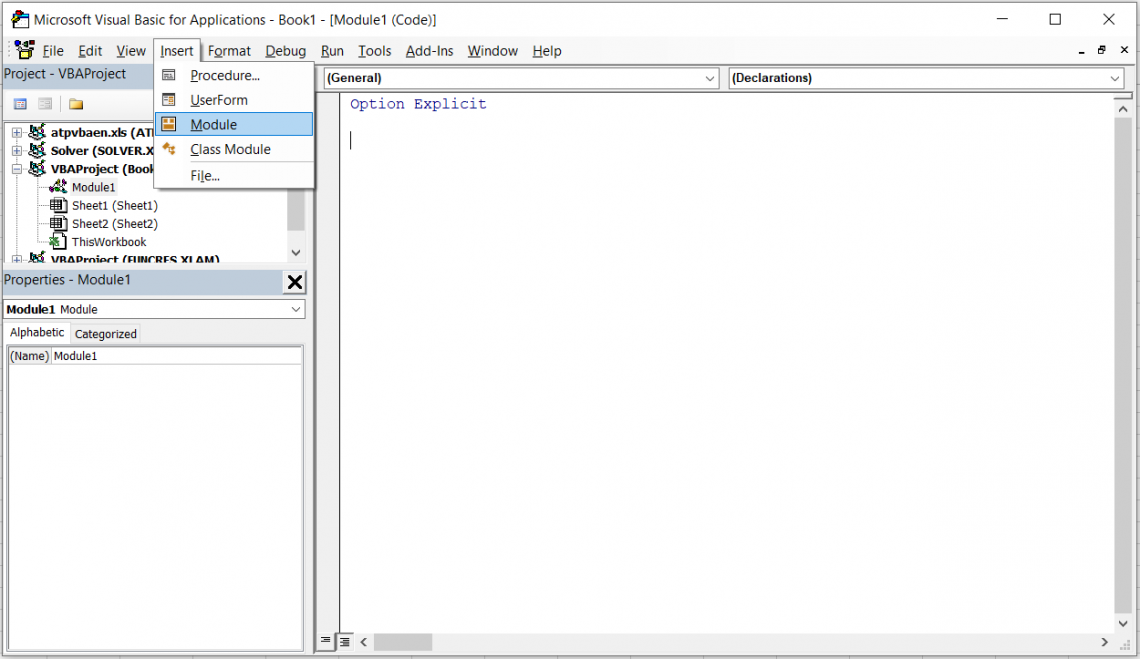
Click on Insert > Module, which will add a module in your VBA window, allowing you to write the code.
2. Writing the code
You cannot directly jump to writing the critical piece of code. All the codes begin with a two-line code, i.e., the Sub and the End Sub.
Writing Sub means a small program will be written within it to perform a specific task.
The window looks as illustrated below:
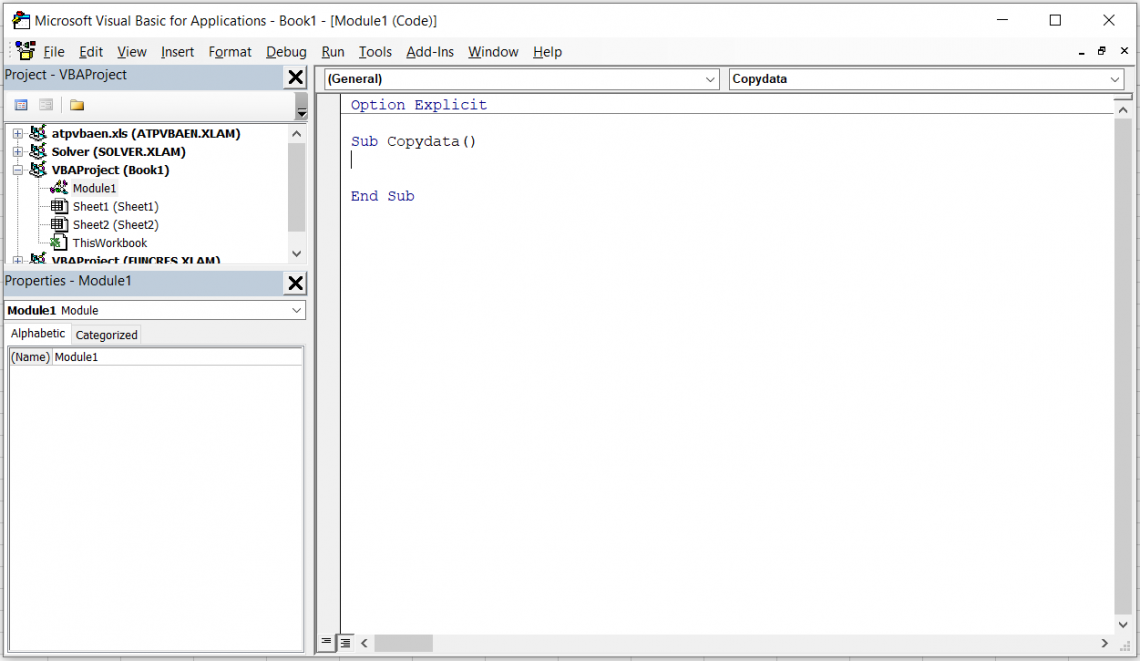
We named our Macro’ Copy data’ followed by () because that’s what we intend to do - copy data from one file to another.
First, we want the code to open our input file. Let’s assume that you receive the file in the same folder daily.
The code that we will write to open the file will be:

We assign two variables, where one is a variant. What does a variant mean? It can take the value of any type. We assign the variable’ path’ as a text string and store the folder address.
Next, the address for the variant ‘input_file’ is stored as the folder path + the file name, i.e., the entire address for the file becomes C:\Users\Lenovo\Desktop\Macro\Input file.
An ‘If statement’ checks whether the file exists in the ‘that’ folder and opens it using the Workbooks. Open code. If the file does not exist, you will get a Msg box with a warning “File does not exist!”
To check the code so far, click on the Debug tab and select the Step option. You can also press F8 on the keyboard to check whether each line of code is working properly and you are not getting any errors.
3. Copying the data
Great! You have opened the workbook using the code. Now comes the critical part - copying the data. We see that there are eleven rows and five columns in our dataset.
There are several ways to copy the data from the input file to the output file. First, let’s assume we do not have any blank cells between our data.
The code that we will use is illustrated below:
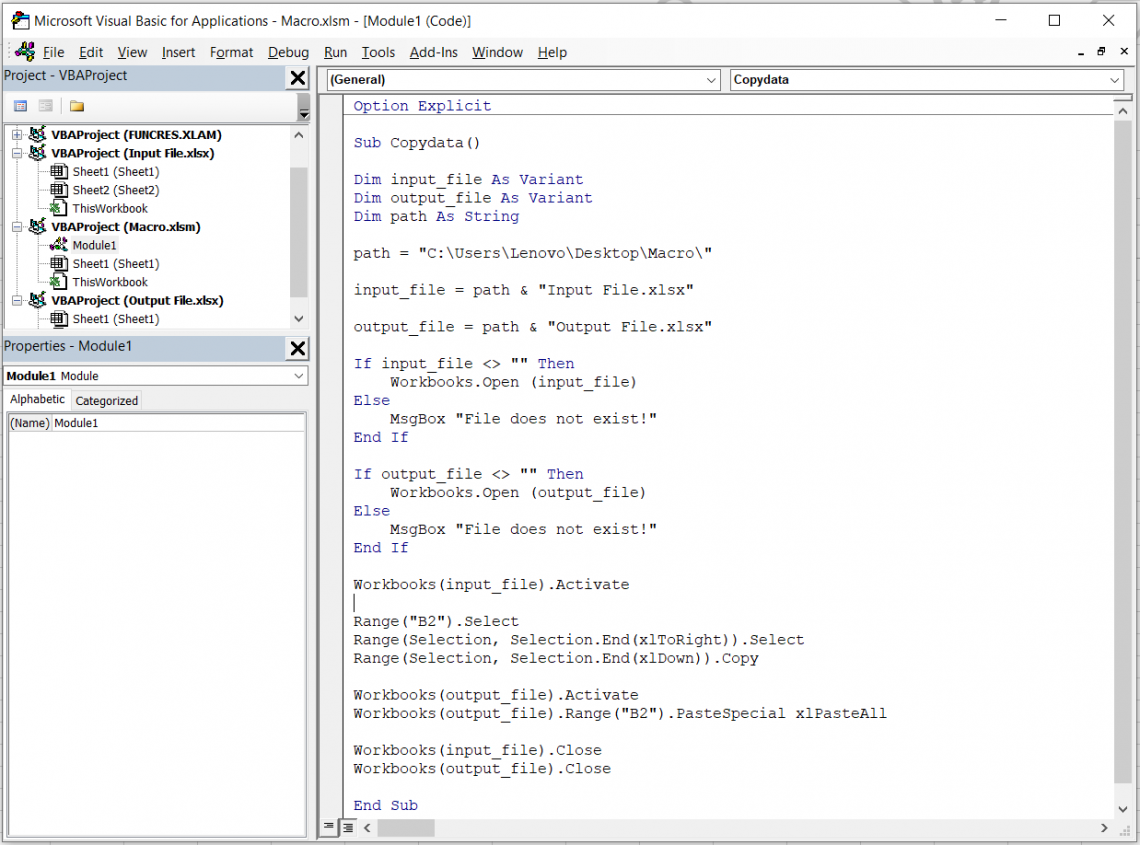
You might be thinking, “What the heck!” The code just went 0 to 100 quickly. Well, nothing fancy. Let us check it out to understand it better.
The first thing we did is that we assign another variable as output_file for the file in which we would copy the data.
The code for opening the output file was repeated, and we finally wrote the code to copy data.
We identified that the data starts from cell B2 so we write a line that selects the cell as Range(“B2”). Select
Using the following two lines, we essentially select the data up to the end, i.e., until the data exist in the spreadsheet and copy using the. Copy syntax
Next, we activate the output file and select cell B2 to paste the data using the PasteSpecial xlPasteAll syntax. The xlPasteall pastes everything from the copied data, i.e., values, formatting, borders, etc.
Finally, we close the input and output files in the last two lines above the End Sub syntax.

4. Running the code
Now that the code is written, we need to check whether it actually runs. First, save the macro file as an Excel Macro-Enabled Workbook(*.xlsm) extension so that when you open the file next time, you can run the macro.

Before directly pressing the F5 key in the VBA window, always try to debug the code using the F8 key so that you can immediately find the errors and fix them before a final run.
To check whether all the variables are working, you can just hover the mouse over the variables after the code runs to check if they are storing the assigned values.
For example, after running it in debug mode, we hovered over the ‘path’ variable. As a result, we see that the path has stored the value “C:\Users\Lenovo\Desktop\Macro\,” which is precisely what we wanted it to store.

Currently, the code is in debug mode and about to run the code input_file = path & “Input File.xlsx.” When you press the F8 key and hover the mouse over the input_file variable, you see the value stored as illustrated below:
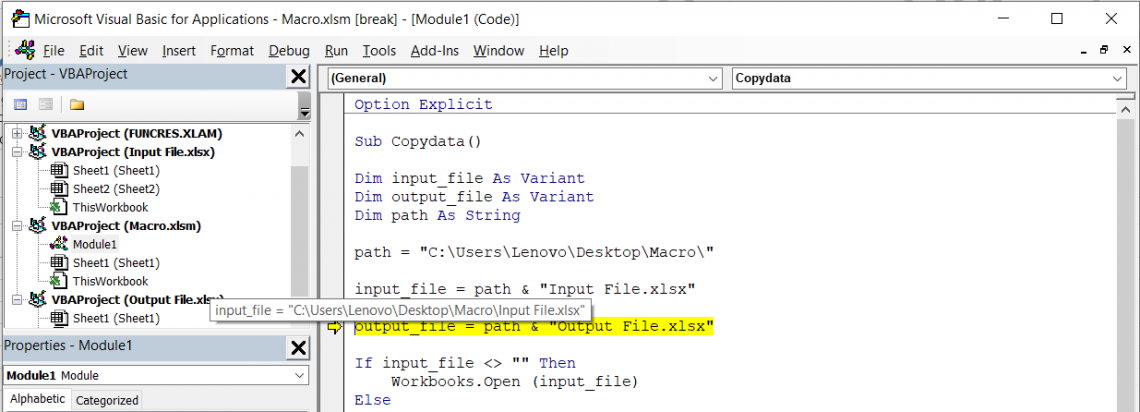
The value that is stored for input_file is “C:\Users\Lenovo\Desktop\Macro\Input File.xlsx.”
This is the same path used in the IF statement to open the file if it exists in the folder. So yes, you can check the values stored for different variables while the code is in debug mode.
Lastly, you wouldn’t want to run the code every time by clicking on Developer Tab > Macro > F5.
So, what else can you do?
It’s straightforward. Just create a button on the spreadsheet by selecting it from Developer > Insert > click on the button.
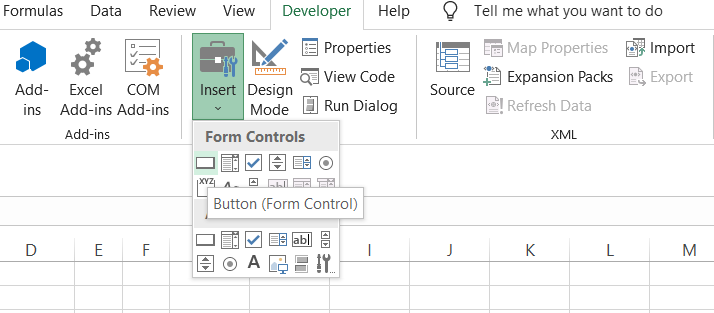
This will allow you to draw a button in the spreadsheet. Once done, it will open the dialog box as illustrated below:
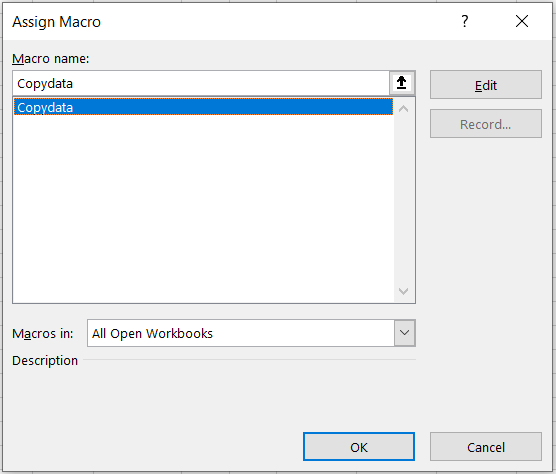
Here, you will select the macro, i.e., the code we wrote, the ‘Copy data,’ and click on Ok.
You can also right-click the button and edit the text to whatever you like. The final macro button looks as illustrated below:

When you click on the button, the macro runs in the background. You can also add a code line MsgBox “Macro has run successfully” before the EndSub, which signals that the macro has ended.
Now, check the output_file in the folder, and you will find that all the data from the input_file is copied into the output_file.
And that’s it! You have successfully made your VBA code that copies the data from one file into another.
Bonus Section
This section will comprise snippets of Visual Basics for Application code that you can include in any macro to make it more dynamic. These would be snippets of general codes that you would usually find useful but don’t necessarily mean that you need to use them in every macro.
a) Code Snippet #1
Finding the last row and the last column is one of the most important snippets of code that you would need to write to make your code dynamic.
You won’t always find the data with the same number of rows and columns, i.e., it may vary daily in the files. One of the codes that you can use is to find the last row or last column, as illustrated below:
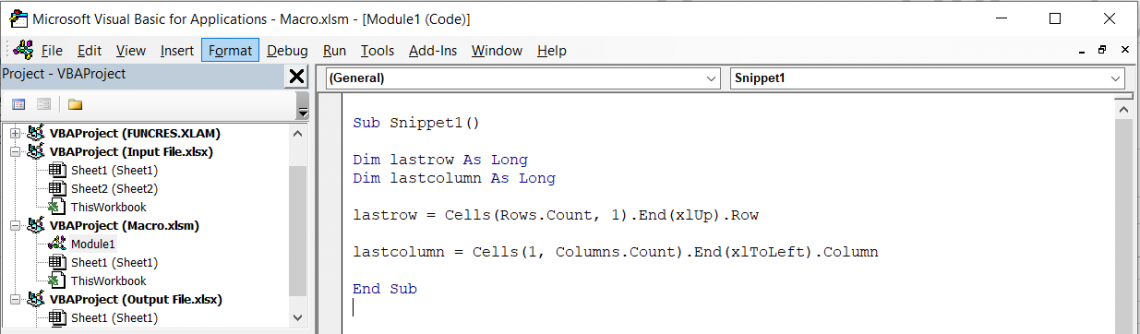
Using the last row code will find the final row with data, whereas the last column will find the last row with data.
Remember that the lastrow = Cells(Rows.Count,1).End(xlUp).Row currently finds the last row with data in Column 1.
By changing the column number, you can easily find the last row for those respective columns. For example, the last row for the 20th column will be found using
lastrow = Cells(Rows.Count,20).End(xlUp).Row
The same changes can be made for the lastcolumn code as well. Another thing to remember is that you don’t need to assign multiple variables, i.e., lastrow, lastrow1,lastrow2,lastrow3….etc., every time to find a lastrow in Excel.
Simply activate the worksheet where you want to find the lastrow, and then input the code to find the lastrow, and it should do the trick.
b) Code Snippet #2
Another snippet of code that is extremely useful is the For...Next loop along with the lastrow code.
Let’s say you need to look through the entire data up to the last row and perform some operations, such as copying the data.
The code would look as illustrated below:
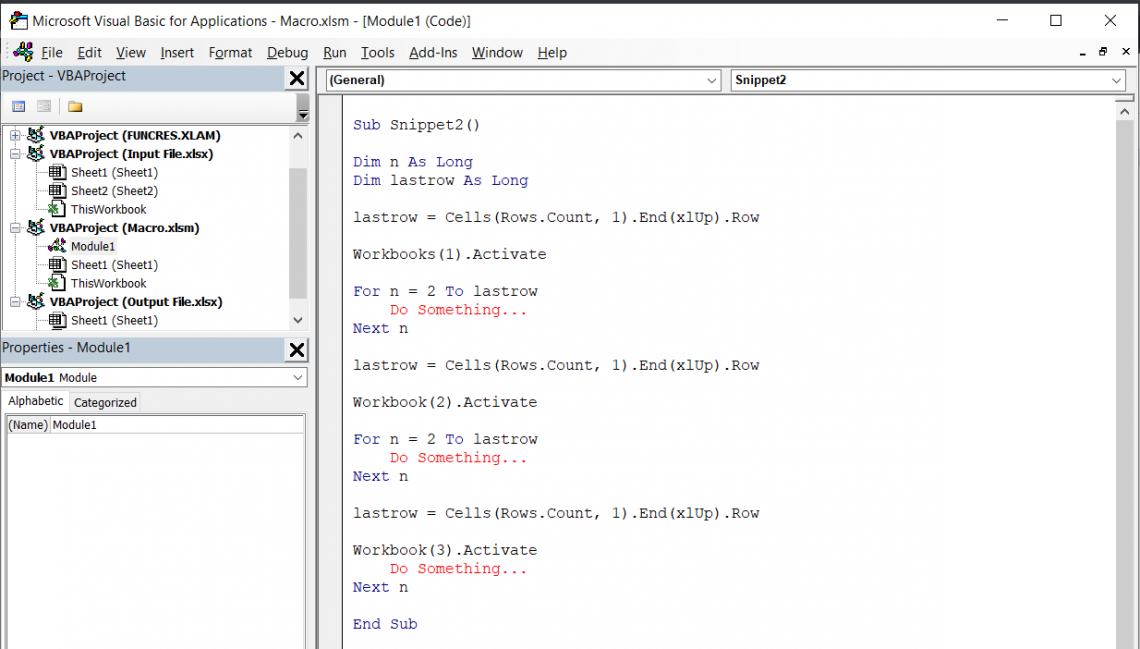
As you can see above, we assign a variable ‘n’ and then input it into the For...Next loop from selected value to lastrow.
This will make the look to check all the values in that particular cell, perform certain operations, and then move on to the next cell in the dataset.
We have also demonstrated what we spoke about in the lastrow code in the previous snippet. Even though we have used the ‘lastrow’ code multiple times, we have only assigned it once at the beginning of the macro.
To be honest, if you want to be good at writing Visual Basics for Application code, just open up the developer tab and practice different codes yourself. In a real-life scenario, no two codes would be the same even if they perform the same task.
So, if someone says, “Hey, you could have written this code this way instead of this snippet of code,” then accept it because nothing’s wrong in VBA unless you get something like:


or Want to Sign up with your social account?